Components You'll Need
To run WebDriver tests in Java with Eclipse you’ll need:
- Java
- Eclipse
- A test framework (We’ll use JUnit; there are many you can use)
- WebDriver’s Java bindings
- WebDriver’s Java Standalone Server library
- Mozilla’s Gekodriver proxy for Firefox
Getting Java
WebDriver’s Java bindings require a version of Java on the system you’re running your tests from. WebDriver’s Java bindings require only the Java Runtime Environment (JRE), but you’ll be fine if you have either the Java Development Kit (JDK) or JRE installed.
Download java from - https://www.java.com/en/download/


Selenium Webdriver is a collection of Java library with some predefined methods.


Download java from - https://www.java.com/en/download/
Configure Eclipse
Download Eclipse for from their official website
eclipse IDE 32 or 64 bit.


Download it

Extract the downloaded file.


Open the extracted eclipse-standard folder
Open eclipse folder

Open Eclipse.exe


Configure Eclipse for Selenium
Selenium Webdriver is a collection of Java library with some predefined methods.
In Java term collection of library is packed into jar files (Java Achieve file).
Step 1- Open any browser and navigate to http://docs.seleniumhq.org/download/
Step 2- Navigate to Selenium Client & WebDriver Language Bindings Section and download Java library files. These jars will come into zip files that we need to extract

Step 3- We will also download the Selenium server, which is known as Selenium RC server

Now we are almost done now let us open eclipse and install TestNG also.
Open Eclipse

Eclipse home page
Step 2- In eclipse, we have some default plugin available now we will install external software into eclipse.
Click on Help then Install new software
Click on Help then Install new software

Click on help
Step 3- We have to provide TestNG URL so that eclipse can fetch TestNG plugin

Specify the URL
Test NG URL- http://beust.com/eclipse.
Step 4- To get TestNG URL please visit http://testng.org/doc/download.html and
copy the below mention URL and paste the same URL in Eclipse and Press Enter

Copy download URL

Select TestNG checkbox
Click on Next
Step 5- Accept the term &condition, and click on finish button.
During installation, it will ask you to restart eclipse so please go ahead to restart eclipse.

Creating The Project
Eclipse works with the concepts of workspaces—folders and spaces where you work with your projects. In this example, I’m using a small workspace I’ve just created for example projects. Teams use different approaches for workspaces and project structures. Use whatever you like with your own small sample projects; however, make sure to follow your team’s pattern for real work. (Workspace and project structure is almost as hotly debated as tabs versus spaces. Be kind.)
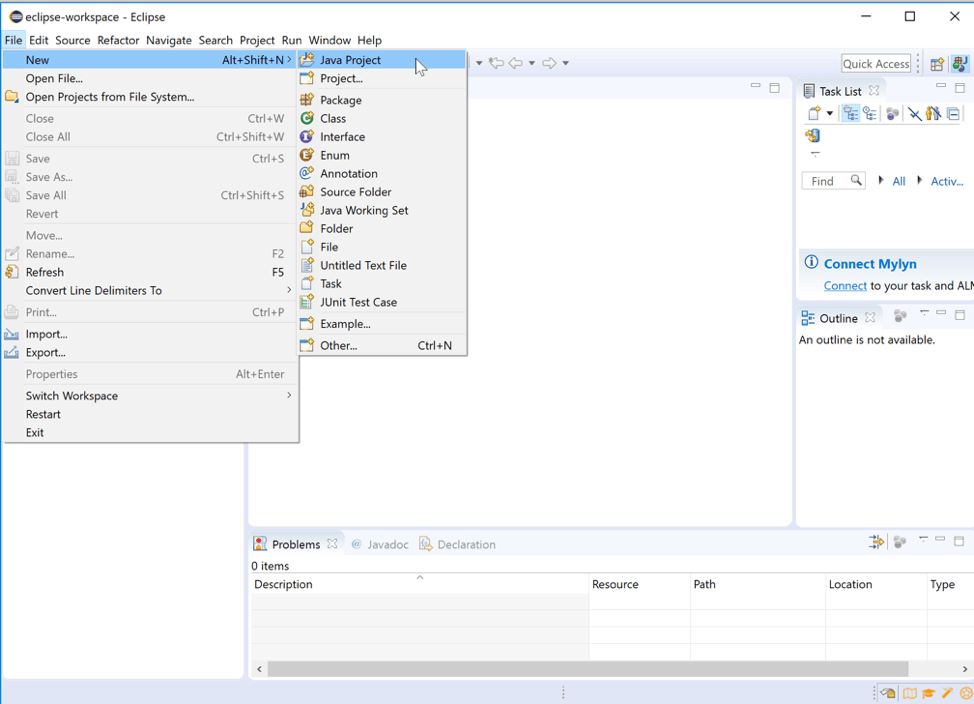
This article uses a simple Java Project created by using the menu File => New => Java Project.
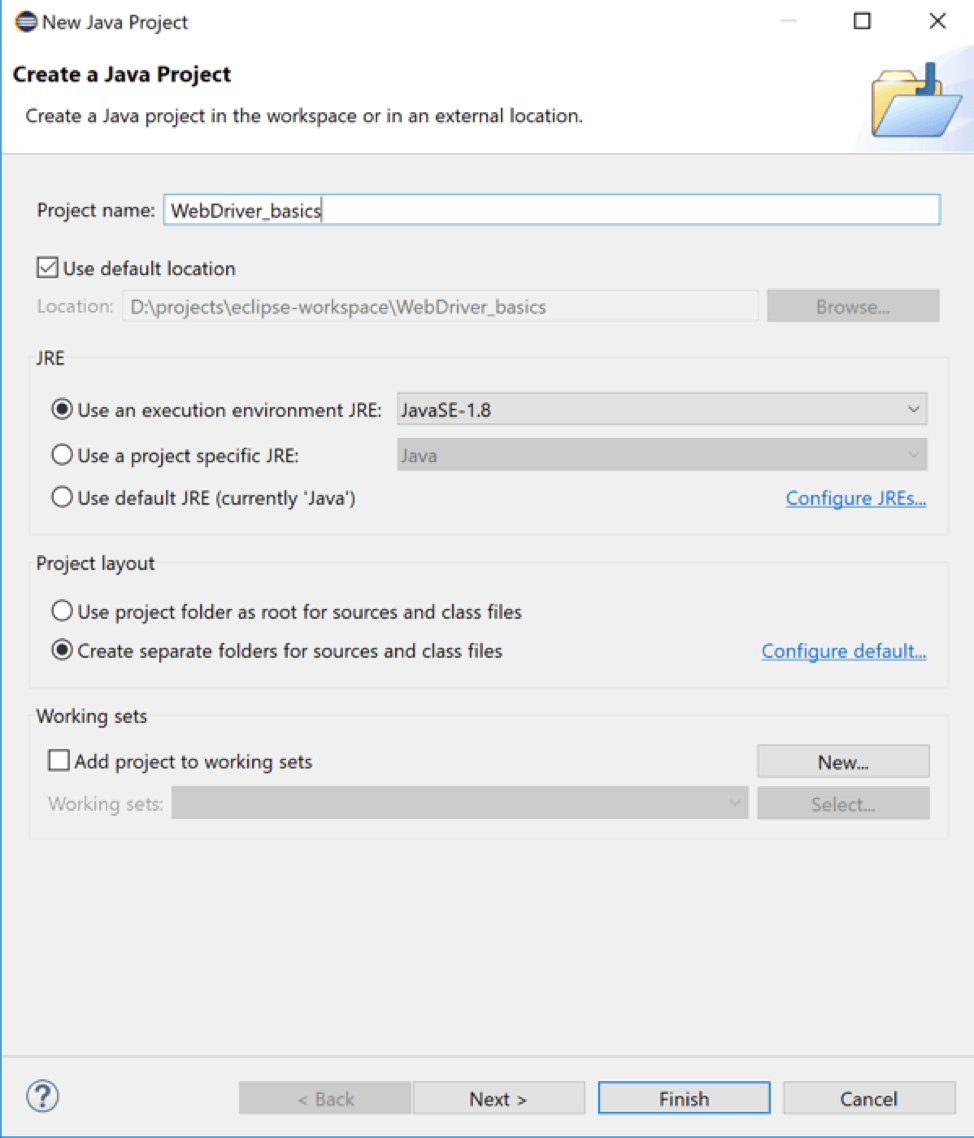
Fill out the basic information on the New Java Project dialog, then click Finish to proceed.
Adding WebDriver to Eclipse
As mentioned earlier, there are many ways to include WebDriver in your Eclipse projects. Most mature teams use a build and dependency management system like Maven or Gradle. This post uses a simple static library inclusion due to the wide variances in how teams organize Maven and Gradle.
Load Libraries Into Eclipse
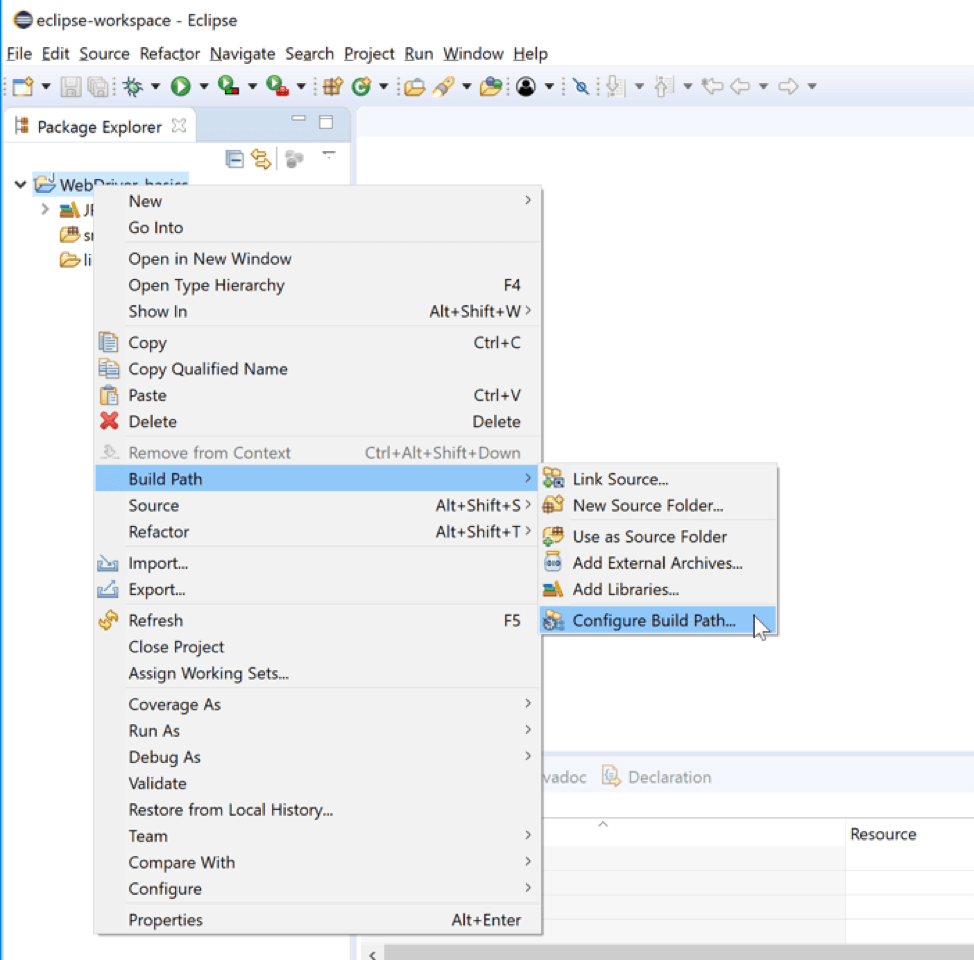
Download the Java WebDriver bindings and save the zip file to a handy spot. I generally include a “libs” folder in my projects for external libraries like this. In Eclipse right click on the project, then select Build Path => Configure Build Path.
In this example we’ll also be using the FirefoxDriver for Mozilla’s browser. That means you’ll also need to download the Selenium Standalone Server, which includes the FirefoxDriver, plus remote drivers if you’ll be using them.
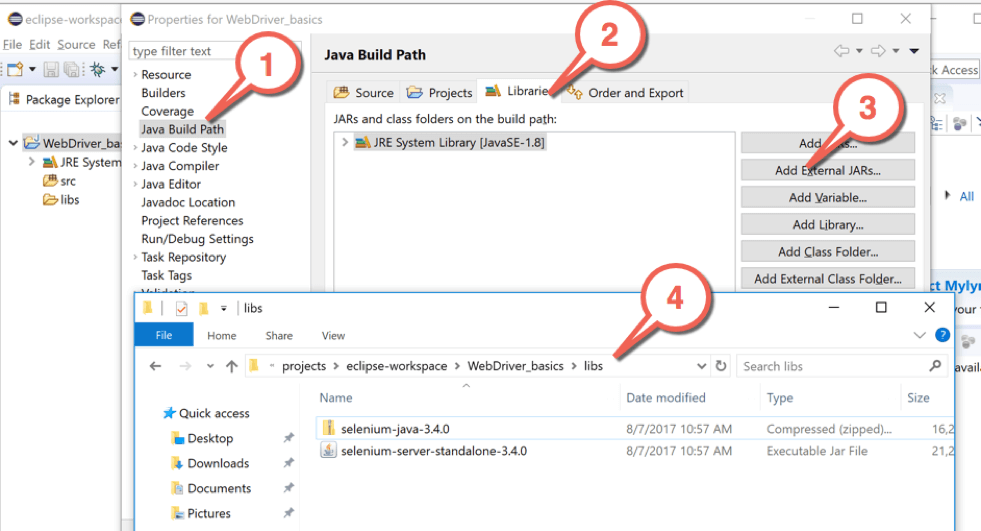
In the Project Properties dialog, select Java Build Path then the Libraries tab. Click Add External Jars, then browse to where you saved the Selenium Java language bindings—the “libs” folder in my example. Select that file and click Open to save your changes.
Position The Browser Driver Proxy
Finally, we’ll need to set up the Firefox driver proxy. Again, there are numerous ways to handle where to place the executable, how to configure it, how to invoke it, etc. These ways also differ for other browser types. (Remember, you likely need similar proxies for other browsers like Chrome, Internet Explorer, or Edge.) In this case, I’ve saved the file “geckodriver” to my ~/Utils folder. Firefox’s Gecko driver requires you to specify its location in code, not just have it on the path. You’ll see that in the sample code below.
SIMPLE TEST
Below is a complete test case that starts a browser locally, executes a very simple test, then closes out the browser instance. The example is extremely simple.
package TestNG;

import org.testng.Assert;
import org.testng.annotations.AfterMethod;
import org.testng.annotations.BeforeMethod;
import org.testng.annotations.Test;


public class WebDriver_basics {

 @BeforeMethod
 public static void beforemethod() {
      System.setProperty("webdriver.chrome.driver", "D:\\Seleniumm\\chromedriver.exe");  //path of the geko driver
  ChromeDriver driver = new ChromeDriver(); // constructer called from imported class
  driver.get("https://www.google.com");

}

 @AfterMethod
 public static void aftermethod() {
      closeBrowser();

No comments:
Post a Comment